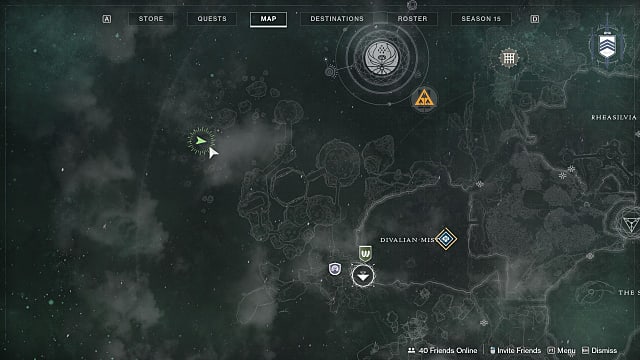
For Week 1, there are five Altas Skews scattered about the Dreaming City. Here’s how to start the quest and find what you’re after.
Head to the Awoken Wing of the H.E.L.M., and interact with the Wayfinder’s Compass to begin the exotic quest. There, you’ll speak with Queen Mara in her chambers beyond the portal. She’ll tell you about a childhood tale she and her brother are quite fond of, then set you off in search of the Astral Skews.
The most involved step so far has you combing hidden areas in the cursed Awoken Dreaming City. Here are the locations of the five Skews in the order you should seek them.
Atlas Skew 1: Drowned Bay Alcove
You’ll find the first Skew in the Bay of Drowned Wishes Lost Sector that sits just behind the spawn point. Enter the Lost Sector, clearing enemies as you go. Stick to the right-hand wall, and you’ll eventually run into the Skew.
Altas Skew 2: Divalian-Cimmerian Path, Central Cave
The second Astral Skew is in a small cave just across from where you spawn in the Divalian Mists. It’s at the base of the doors leading to the Blind Well, and if you aren’t sure which cave to look for, wait for a few enemies to spawn and walk out of it to the right of the hill. Once inside, turn right to find it.
Sometimes a loot chest also spawns there, and it’s the only cave directly across from the spawn point.
Atlas Skew 3: Divalian-Rheasilvia Path, Lower Cliffside
For your third one, head along the path to the left of the large gateway and look down along the cliffs. The platform you’re looking for is midway between the path leading west to the Spine of Keres and the cave system leading to Rheasilvia. It’s on the lowest platform.
Altas Skew 4: Spine Oracle Orrery
From the one above, turn back to the west — or left facing the cliffs — and head down the path over two chasms along another rockface. Go into the large purple-colored room where you’ll see the spinning device called the Oracle, which you’ll recall from the Forsaken campaign if you played it.
Make your way up the staircase at the right of the room. Go past the Techeun and, once you reach the top, you’ll see the Skew.
Atlas Skew 5: Distant Spine Tree Island
The final collectible is at the far end of the Spine of Keres, where you first enter the Dreaming City during the Forsaken Campaign. It’s underneath a tree on the first (or final, in this case) island. To get there, make your way out of the Oracle chamber and follow the path, keeping right.
You’ll know you’re on the right track if the buildings and high walls give way to open skies and sheer cliff faces. Keep going until you run out of islands. What you’re after is to the left on the far side of the rocky outcropping.
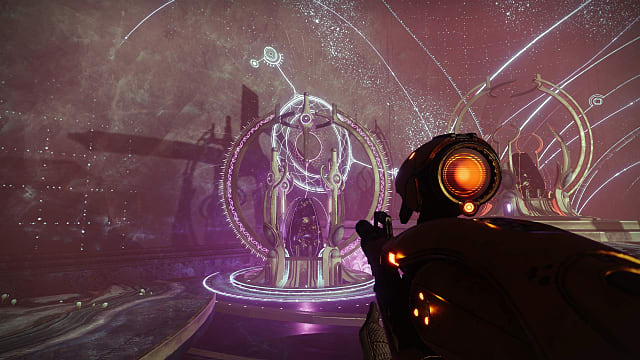
With the Skews in hand, you’ll have to open the H.E.L.M. in the Director and select the “Hollow Coronation” single-player mission. Go through the portal, place the five Skews in the leftmost reliquary. Listen to Mara speak, and you’ll be done with Week 1 of Tracing the Stars in Destiny 2.
Tracing the Stars: Week 2
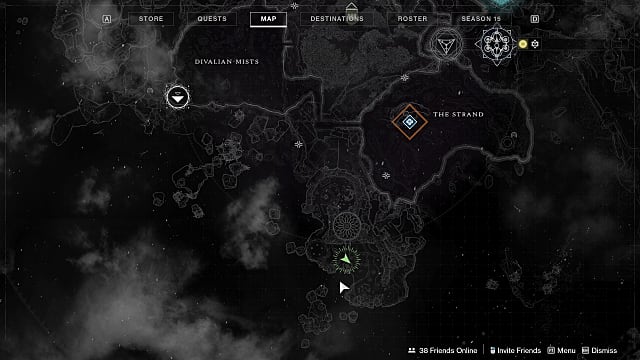
Week two of the Exotic quest follows a similar format to the first week, however the Skew’s are easier to find this time around. You’ll spend all of your time in and around The Strand.
As with Week 1, go to the Wayfinder’s Compass in the H.E.L.M. to pick up the start of the quest. Then go through the portal in the Awoken Wing to speak to Mara, who will send you on your way to the Dreaming City.
Atlas Skew 1: Strand Towering Statue
You’ll find the first Skew near the Public Event arena, on a high cliff with a statue’s head jutting out of it. Turn left from where you enter the Strand until you come to a fork in the road, then turn around. You should see the statue poking its head out of the rock.
Jump on the outcropping nearby to get the height you need to reach the Skew and collect.
Altas Skew 2: Strand Gazebo Statue
At the most eastern point in the Strand sits an elaborate gazebo. Head there, then jump over the rocks at its back, directly across from the electronics and equipment. The Skew is nestled beneath some bushes.
Atlas Skew 3: Aphelion Brazier
Make your way to the Aphelion’s Rest Lost Sector just below the gazebo and fight all the way to its end. The Skew sits behind the brazier above the loot chest. You’ll receive a HUD icon if you stand directly in front of the chest, so clear the room for some privacy, get your loot, and pick up the Skew.
Atlas Skew 4: Garden Waterfall
Turn immediately left when entering the Strand, or travel to its most southern point, and enter the Garden of Elisa. This Skew sits on the right side of the initial portion of the area in front of the large waterfall.
Atlas Skew 5: Garden Bridge Tree
The final Skew waits on the bridge that bisects the garden. You can either do some fancy jumping to get up there, or you can go to the end of the garden, turn right, and make your way around to the bridge past the Taken portal.
No matter how you make it to the tree at the bridge’s end, the Skew rests just beneath its branches.
Once you’ve got the five new Skews, open the H.E.L.M. menu and launch A Hollow Coronation, then deposit the Skews in the altar, listen to Uldren tell a story, and be done.


