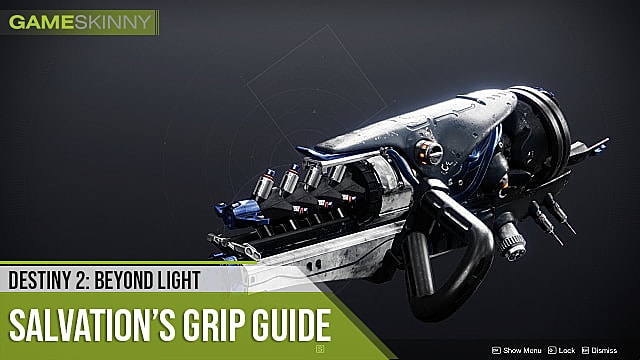
Getting your hands on this unique weapon isn’t difficult, but there are a few involved steps, and you’ll need it for Entropic Shards. This guide will walk you through everything you need to do, so let’s get started.
Steps 1 & 2: Finish Campaign and Speak to Drifter
First and foremost, you have to complete the Beyond Light campaign by defeating Eramis. Talk to Variks and Zavala to open up the post-game quests and collect No Time to Explain from the Exo Stranger.
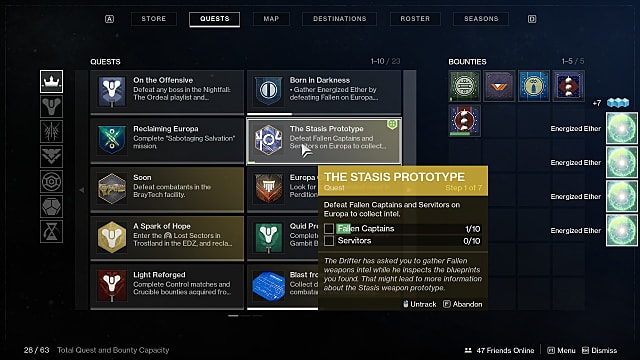
Then head to the Tower and talk to Drifter. He’ll give you the first part of the quest, which asks you to kill Fallen Captains and Servitors on Europa.
Step 3: Captains and Servitors
You need to kill 10 Captains and 10 Servitors to progress this first part of the quest. There are a few good places to farm these enemies.
Cadmus Ridge has several roaming Captains and Servitors scattered around the area, and one of the campaign missions spawns a big Servitor as well. The Concealed Void Lost Sector has at least one Servitor and one Captain, as well. Ultimately, you can do this part of the quest anywhere, though Eventide Ruins and Cadmus are your best options.
Steps 4 & 5: Reclaiming Europa and Sabotage
Zavala will give you the Reclaiming Europa quest following the campaign’s completion, which opens up the Sabotaging Salvation mission. Complete it and visit Variks in Charon’s Crossing. There, you can pick up the Empire’s Fall quest and two Sabotage quests.
Sabotage is akin to the Season of Arrivals Recaster bounties, as they progressively become more valuable over time. You’ll only have access to two at the beginning, and they’re straightforward.
Europan Protector 1 asks you to defeat 50 combatants on Europa, then Europa Challenges 1 asks you to complete eight bounties from Variks. In short, kill anything and pick up some Repeatable Bounties, then go to town.
Steps 6 and 7: The Aftermath and The Dark Priestess “Empire’s Fall” Missions
You’ll need to be about Power 1180 by the end of this two-quest sequence, as the Dark Priestess has a very tough boss fight at its end.
Once you complete the Aftermath, return to Variks to pick up the Dark Priestess quest, which asks you to kill Fallen in Cadmus Ridge and collect the Flecks of Dark they drop. Be aware you won’t get one every kill, and you’ll want to focus on headshots whenever possible, as that increases the odds of a drop.
After you’ve collected enough Flecks of Dark, you’ll defend another Fallen Skiff, the same way you did in the campaign. Then comes the Dark Priestess quest itself, which takes you back to the Eramis boss arena for another fight.
The Dark Priestess Tips
You’ll want to always keep some cover between you and the boss, as the boss shoots volleys of Stasis energy that freeze you on contact, and there are plenty of death pits she can freeze you into.
Stay away from her and clear all the mobs as they spawn. She’ll summon Servitors to give herself a shield three separate times, and you’ll need to kill them all to damage the boss again.
Only move when you know she’s not attacking and be mindful of the melee enemies. They hurt — a lot.
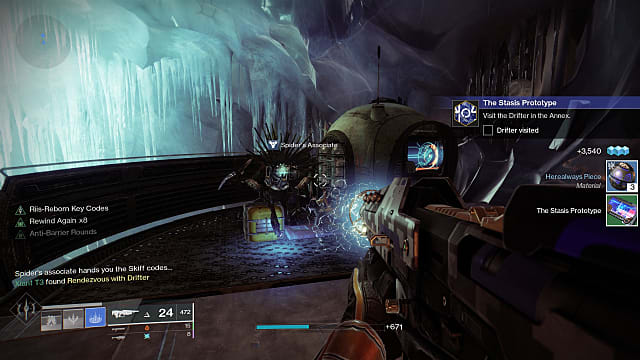
Step 8 & 9: Use Stasis and Meet Spider’s Associate
The eighth step to the quest requires you either kill enemies with Stasis or while they’re affected by it while on Europa. That means grenades, melee abilities, and Super kills all count for this part. Any Lost Sector is great for this, as the enemies are usually clumped in small spaces.
Once you’ve finished that small grind, head to the Concealed Void Lost Sector and complete it. You’ll meet one of Spider’s Fallen next to the loot chest. Speak to him, then return to Drifter to unlock the final mission that rewards Salvation’s Grip.
Step 10: Steal Salvation’s Grip
A mission flag will appear outside Variks’ room and is a straightforward, linear affair. Kill everything and do whatever the quest tab tells you to do. Then, once you reach the room where Ghost says the weapon is, pick it up and escape.
Once you’re back outside, there will be a set-piece fight with plenty of Heavy Ammo for you to try out your new grenade launcher. Once the quest ends, you officially own the Salvation’s Grip.
That’s all you need to know about getting Salvation’s Grip exotic in Destiny 2: Beyond Light. Now you’ll be able to start gathering Entropic Shards across Europa. We have a guide for that if you’re wondering where to find them. If this guide was helpful, please consider giving it a share, and stay tuned to GameSkinny for more on Destiny 2.